
Browse the documentation
How to invite a team member and set their rights
Applies to: All users · Optional feature — available when your network has it switched on
Give a colleague their own login to your account instead of sharing your password. You choose exactly what they can see and change, and you can remove them again at any moment.
Before you start#
- You must be the account owner or an Admin member. Other members don't see the Members page.
- If Members is missing from your account menu entirely, team members aren't enabled for your account — an administrator can switch it on.
- Know your colleague's email address and what they should be able to do (for example: manage campaigns, read statistics, no billing).
Steps#
Open the Members page#
- Click your name in the top bar.
- Choose Members.
You'll see everyone with access to this account, plus pending invitations.
Send the invitation#
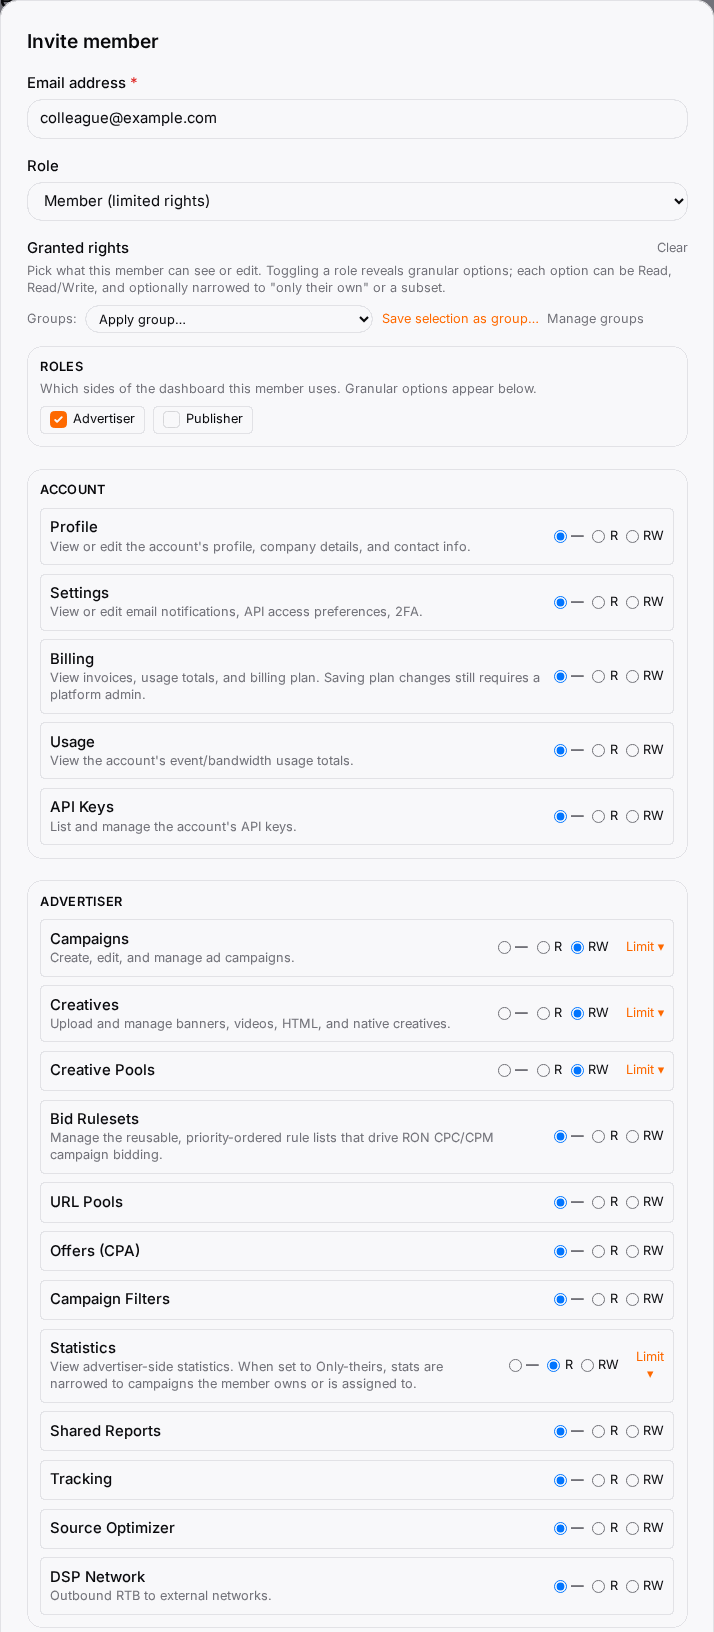
- Click Invite member.
- Enter their Email address.
- Choose a Role:
- Admin (full, except ownership) — everything you can do except ownership-level actions. For a trusted deputy.
- Member (limited rights) — only the rights you tick next. Right for almost everyone.
- For a Member, pick their Rights. Toggling an area (account, advertiser, publisher) reveals its options; set each one to Read or Read/Write, and where offered narrow it to only their own items or a subset. You can only grant rights your own account has.
- Already set up a similar person before? Use Apply group… to copy a saved rights bundle in one click.
- Should this person be able to create API keys on your account? Tick Allow this member to mint API keys on this account — leave it off otherwise.
- Click Send invitation.
They receive an email with a link that's valid for 14 days. If they already have an account, accepting adds yours to their account switcher; a new email address is first asked to set a password.
Save the rights as a group (optional)#
When the rights are right for a role you'll hire again, click Save selection as group… and name it, e.g. "Campaign Manager". Next time, Apply group… fills the same rights. Changing a group later does not change members who already have it.
Change or remove access later#
On the Members list, use Edit to change someone's role or rights, Resend for an invitation that expired or went missing, Cancel invitation for one that hasn't been accepted, and Remove to take access away immediately. Removing a member never deletes the work they did on your account.
Check it worked#
- The person appears in the list as Pending until they accept, then Active.
- When they sign in, they choose your account in Switch account and see a banner showing whose account they're working in — and only the areas you granted.
Troubleshooting#
| Symptom | Likely cause | Fix |
|---|---|---|
| No Members in the menu | You're not owner/Admin, or members aren't enabled for the account | Ask the owner; or ask an administrator to enable it |
| "Members need at least one granted right" | A Member with nothing ticked | Tick at least one right, or choose Admin |
| An advertiser or publisher right is missing | Your account doesn't have that role | You can only grant what your account has |
| The email never arrived | Wrong address or spam folder | Check the address, ask them to look in spam, then Resend |
| "The invitation was created, but the email could not be queued" | Mail delivery failed | Use Copy link and send the link yourself |
| The invite link has expired | Older than 14 days | Resend issues a new link |
Related#
- Team Members & Roles — how shared accounts, roles and switching work
- How to turn on two-factor authentication — protect the owner login first
- How to create an API key — keys and members