
Browse the documentation
How to block or allow-list domains, ad zones, sub-IDs and IPs
Applies to: Advertisers · Optional feature — available when your network has it switched on
At the end of this guide you'll have a reusable list — for example "never show my ads on these domains" or "only run on these ad zones" — and it will apply to the campaigns you choose. Build it once and reuse it across campaigns. For the full targeting model, see Targeting & Filters.
Before you start#
- An advertiser account with Filters in the menu.
- The values for your list: domains, ad zone IDs, sub-IDs, ISP names or IP ranges. A quick way to find them is Statistics — see the tip at the end.
There are two kinds of list, and they connect to campaigns differently:
| Kind | Types | How it reaches a campaign |
|---|---|---|
| Exclude (block list) | Domain Exclude, Adzone Exclude, ISP Exclude, Sub-ID Exclude | You pick the campaigns on the filter itself |
| Include (allow-list) | Domain Include, Ad Zone Include, IP Pools | You pick the filter on the campaign |
| Sub-ID list (either) | typed on the campaign | You type the sub-IDs on the campaign and choose whitelist or blacklist |
Steps#
Build the list#
- Open Filters and click Create Filter.
- Choose the Filter Type from the table above.
- Add your items, one per line — paste a whole list at once if you have it. Items the panel can't find are left in the box so you can correct them.
- Enter a Filter Name you'll recognise later, e.g. "Bad domains — Q3".
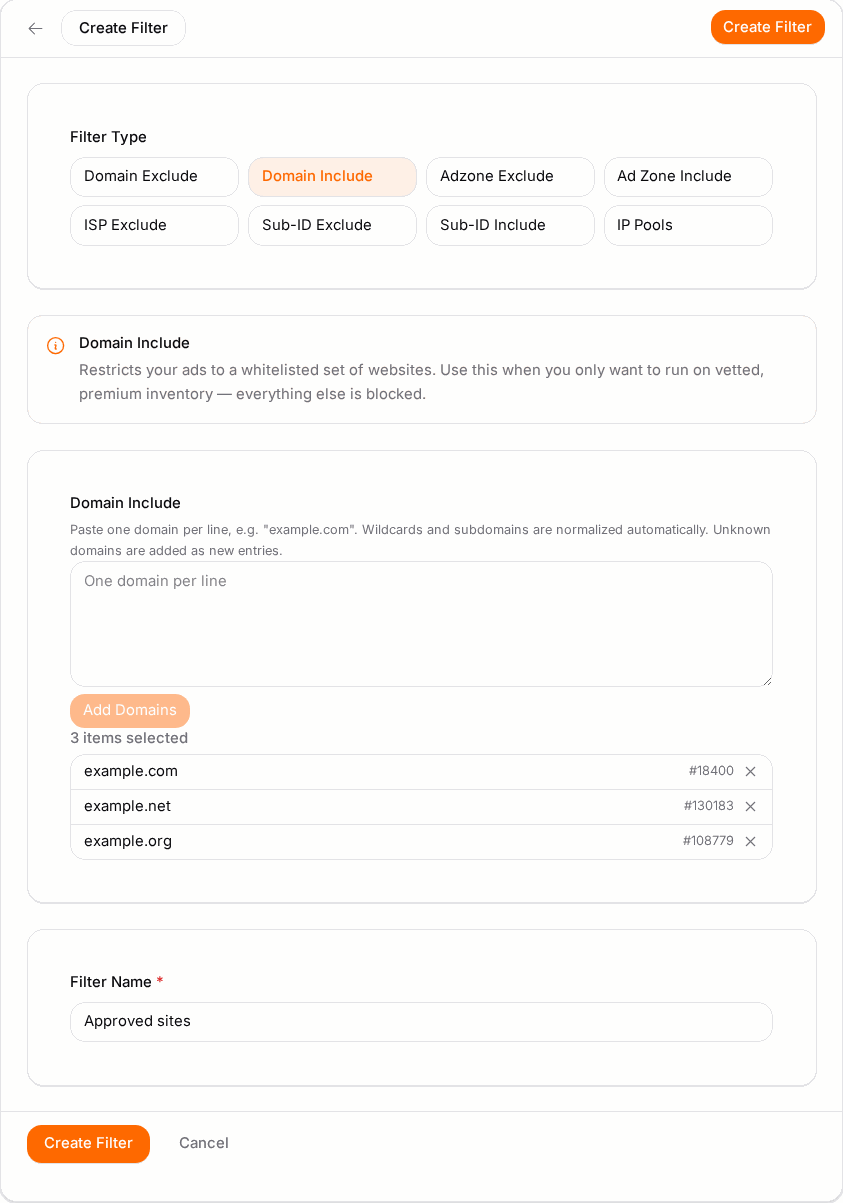
Exclude list: choose where it applies#
- Under Ad type, choose:
- Global level Ad Type — the list applies to all your campaigns of every ad type, or
- one ad type, e.g. Banner — then pick the Campaigns it applies to. Leave Campaigns empty to apply it to every campaign of that ad type.
- Save. The block takes effect right away.
Include list: attach it to a campaign#
- Save the filter.
- Open the campaign (Edit) and go to the Filters step. Pick your list under Domain Filter or Ad Zone Filter.
- For an IP Pools list, go to the Traffic step instead and pick it under IP Pool.
- Save the campaign.
Sub-ID list: type it on the campaign#
- Open the campaign (Edit) and go to the Filters step.
- Turn on Sub ID Filter, type the sub-IDs one per line, and set SubID Filter Mode to Whitelist (only these) or Blacklist (never these).
- Save the campaign. The list also appears on the Filters page, where you can edit it later.
Single IP addresses or ranges for one campaign go in IP Whitelist or IP Blacklist on the same Filters step.
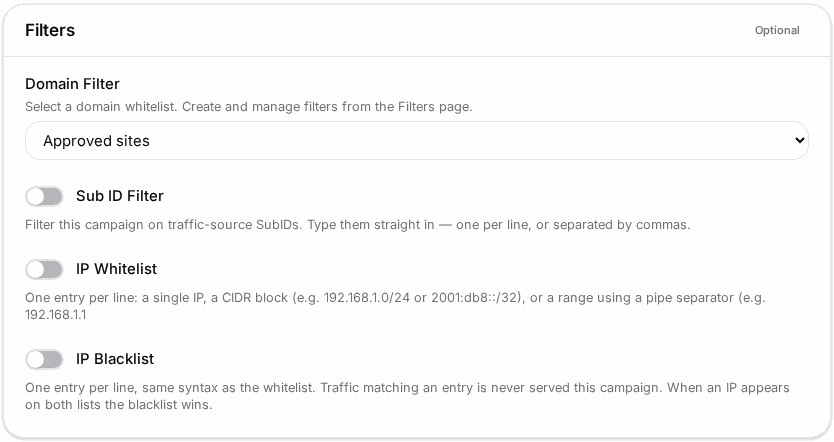
Check it worked#
- In Filters, the list shows Active and its item count.
- For an include list, the filter's edit page shows Campaigns using this filter.
- In Statistics, group by Domain or Adzone for the days after the change: blocked items stop receiving views; with an allow-list, only listed items appear.
Troubleshooting#
| Symptom | Likely cause | Fix |
|---|---|---|
| Blocked domain still shows views | The filter applies to another ad type, or the campaign isn't in its Campaigns list | Edit the filter: check the ad type and campaigns |
| Campaign stopped serving after adding an allow-list | The list is short, so almost nothing matches | Add more items, or remove the allow-list |
| Some items stayed in the box after saving | The panel couldn't match them (typo, unknown ad zone ID) | Correct or remove them |
| Sub-ID values don't match | Your network encodes sub-IDs | Paste the encoded values shown in Statistics |
| I can't find an include list on the campaign | It's attached on the campaign, not on the filter | Open the campaign's Filters step (IP pools: the Traffic step) |
| IP Pool isn't on the Traffic step | IP pools aren't enabled on your network, or you have none yet | Create an IP Pools filter first, or ask your account manager |
Tip: you don't have to build lists by hand. In Statistics, open View Details, tick the rows that perform badly, and use Add to filter to put them in a new or existing include or exclude filter.
Related#
- Targeting & Filters — every targeting option
- Creating a Campaign — the Filters step
- How to read your campaign statistics
- Source Optimizer — block bad sources automatically