
Browse the documentation
How to add a website
Applies to: Publishers
Every ad zone belongs to a website, so adding your site is the first thing you do as a publisher. This guide adds a website, proves you own it where your network asks for that, and gets you to your first ad zone.
Before you start#
- You need a publisher account that has been approved. While approval is pending, the New website button tells you so and stays disabled.
- Have the site's full address ready, including
https://. - If you plan to verify ownership, you need access to the site's HTML header or its web root.
Steps#
- Open Websites in the left menu.
- Click New website at the top right. On an empty list you can also click Add your first website.
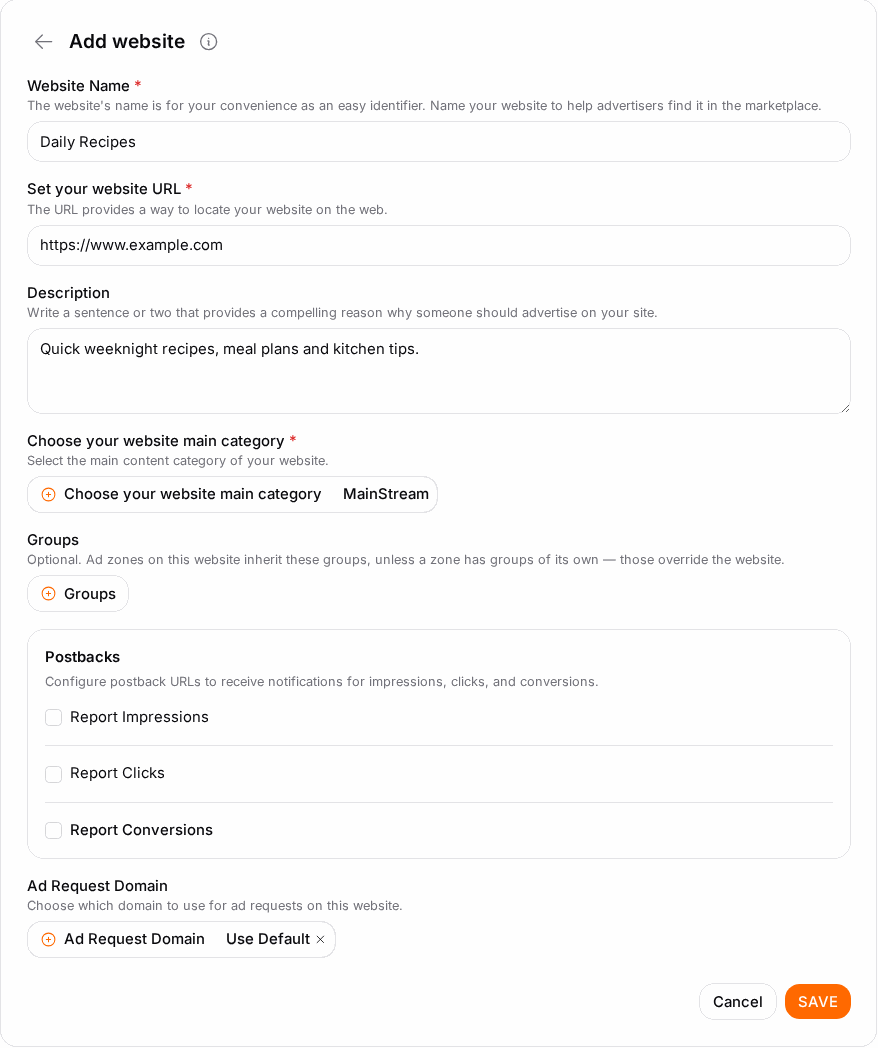
- Fill in the form:
- Website Name: a label you will recognise in lists and statistics, for example "Recipes blog".
- Set your website URL: the full address, for example
https://example.com. - Description (optional): a sentence about the site and its audience.
- Choose your website languages (required): the languages your visitors read.
- Choose your website type: the kind of site (community, forum, games and so on).
- Choose your website main category (required): the main topic of the site. Statistics and campaign targeting use it.
- Categories: every other topic that fits. Selecting all relevant ones helps run-of-network campaigns find your traffic.
- Ad Request Domain: only shown when you have your own domains. Leave it on Use Default unless you want this site's ads served from one of them (see How to serve ads from your own domain).
- Click Save. If something is wrong, for example the address is invalid or the domain is blocked, the reason shows under the field and nothing is created.
Verify that you own the site#
Some networks only serve paid ads on verified sites. When yours does, a new site shows Not verified in the list.
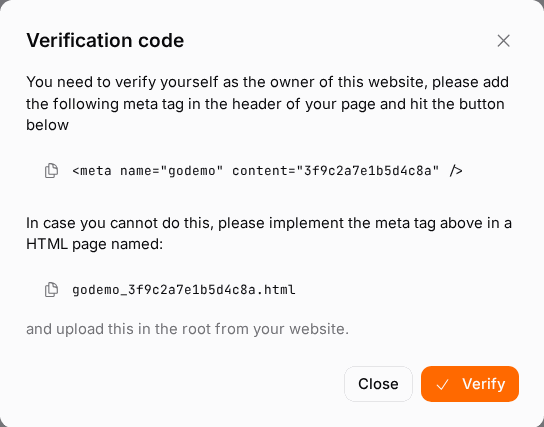
- In the list, click the site's Show verification code action.
- Copy the meta tag shown and paste it into the
<head>of your home page. If you cannot edit the header, create the HTML file with the name shown in the dialog and upload it to the root of your site instead. - Publish the change and open your home page (or the file) in a browser to check it is live.
- Click Verify in the dialog. The site is fetched and the status changes to Verified when the code is found.
To re-check several sites at once, tick them in the list and click Verify in the bar that appears.
Check it worked#
- The site appears in the Websites list with the name and URL you entered.
- Where verification is required, its status reads Verified.
- The site now shows up in the Select your website field when you create an ad zone. Continue with How to create an ad zone.
Troubleshooting#
| Symptom | Likely cause | Fix |
|---|---|---|
| New website is disabled | Your account is still pending approval. | Wait for approval or contact your account manager. |
| "Main category is required" | The main category was left empty. | Pick one under Choose your website main category. |
| "Invalid website URL." | The address is missing https:// or has a typo. |
Enter the full address, for example https://example.com. |
| "This domain is blocked for publishing." | The network does not accept this domain. | Contact your account manager. |
| Verify fails | The tag or file is not live yet, sits on another page, or a cache serves the old page. | Open the home page source and look for the tag, clear your site cache and try again. |
| The site was saved but you cannot find it | A search or filter is active on the list. | Empty the search box and reset the filters. |